February, 2005
News from "The Front" Wherein our loyal Celerity and Marathon builders
chronicle their progress, complete with photos
I want this issue to be about projects, what you guys are
building out there. I've asked for some updates from those of
you who are "in the trenches," slaving away on a regular basis,
and I got a good response. So here goes.
Michael Toft of Edgewater, Maryland, writes: Eldon,
I do everything in a timely manner except respond to E-mail, and I
do apologize. After several more attempts with a variety of methods
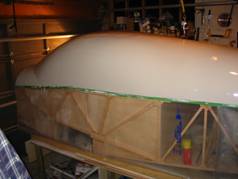
I have finally made a decent windshield. I am currently installing
it, and I am also making new flaps and ailerons. The ones I made
years ago were ok but I thought I could do better. I still have some
sanding and paint along with interior to complete, and even though
I have enjoyed almost every minute of the building experience I am
looking forward to completing this project, I hope to be in the air
by the end of summer, but I have made that prediction before.
Michael
|
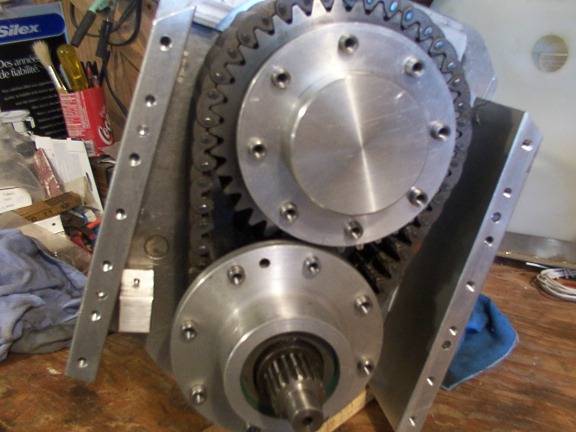
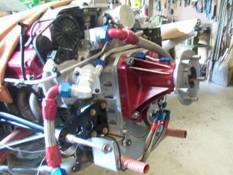
| The heart of Michael Toft's chain driven PSRU, with numerous parts removed for clarity. |
Most of you who read these newsletters already know that Michael
has chosen to use a Cadillac Northstar engine with a chain drive
PSRU of his own design and manufacture, quite a project in and
of itself!
|
| Toft's PSRU, bolted on the business end of his Northstar engine |
This certainly doesn't make his project easier, and time to completion
is probably longer, but who else is going to have an airplane anywhere
near the level of Michael Toft's Celerity when he is finished with it?
I'm sorry, but I have to confess that I just love this setup!
Plus, there is absolutely no better sound than that of a V8
engine winding up on an airplane. The V8 made automobiling
great, and they have a lot to offer to us airplane builders also.
Take a look at these photos and see if you agree!
If what I have already seen in his photos is any indication of the
quality of the rest of Michael's work, this should be a truly awesome
airplane.
Naturally there should be ample power for an excellent rate of climb
and remarkable cruise performance from an engine that's generated
excellent press ever since it was first introduced. With the
well-known high speeds attainable using the Celerity airframe (more
than 200 mph cruise on 160 hp with a constant speed prop) this one
should be a real rocket ship!
 Lawrence Hayter, Cobourg, Ontario
Another energetic builder is Larry Hayter, working around colder
outdoor temperatures than many of us can even imagine.
Hi Eldon,
I'm progressing well despite the weather. Temperatures here have
been falling into the -20 F range. If you haven't experienced
that level of cold, goes without saying, epoxy don't cure
well...ha, ha. It's cold enough that you could warm up nicely
by sitting in the meat locker for awhile. My polystyrene turtle
deck plug is now complete and finished with a couple of coats of
primer and two coats of high-gloss enamel. I have waxed it and
prepared the glass but am waiting for the temp to go up close to
the freezing point so I can generate enough heat in the garage
to do the glassing of the deck.
I'll be using two layers of 3.8 oz inside, ¼ inch corecell foam
(tiled in place with micro), then one 3.8 oz. and one 3.0 oz
on the outside. Right now I'm leaning toward gullwing doors
but I'm having a few problems with the design at this stage.
Any help would be appreciated.
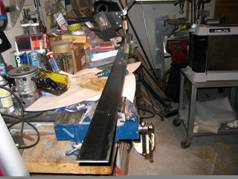
|
| Here is my 6-foot flexible spreader/sanding block made from 1/8 in. cold rolled steel. |
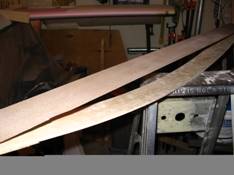
|
| My flexible sander made from a piece of ¼ in. ply as a "bow." The "bowstring" is a piece of sanding belt about 3 feet long. Great for compound sanding. |
Having lots of fun in the "...COLD..." country.
Cheers, Larry
 David Christensen, Brigham, Utah
David has done a few things differently with his Celerity
project. For example, Dave's Celerity will be a fixed gear
taildragger with the main gear mounted onto the fuselage rather
than the wing spar.
Also, Dave will be using the same method of wing skin covering that
Larry Burton used in the first Celerity prototype, rather than the
current Oreo sandwich skin design.
Okay Eldon,
I have been working on the wing. The ailerons and flaps are
built and the controls are completed except for molding the lead weights
onto the aileron mass balances and painting some of the components.
I just finished installing my fuel tank shells and fuel level probes
and am working on bonding foam strips onto the outside surfaces of the
fuel tanks to bring them into contour.
This will give me a sandwich structure along most of the leading edge
except for parts of the strake areas, which will be thicker foam with
glass only on the outside.
The ribs I brought out to contour by laying up 8 oz fiberglass tape
on both sides flush with foam strips which were sanded to contour
before laying up the fiberglass tape. I put a strip of strapping
tape over the foam strip and laid the fiberglass tape edge even with
it in contour. I plan to bond 1" foam between the ribs, sand to
contour and sand away fillet gaps on both sides of each rib. When
I install my fiberglass I will fill these areas with flox/resin to
interconnect the ribs with the skin.
I will lay-up all of my fiberglass on the outside of the foam similar
to the KR-2 construction. I felt more comfortable with doing it this
way and it should be plenty strong. I also made my wing walks since
my plane is a tail dragger. I only have a small area just forward
of the flap where you will be able to step on the wing.
Talk to you later. Dave
 Matt Rix, Lancaster, California
Hello Eldon, It's good to hear from you.
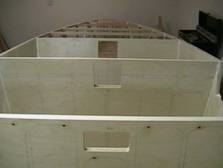
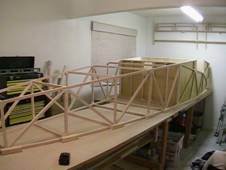
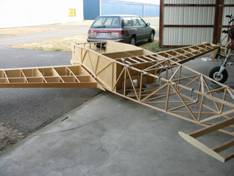
I hope all is well. As for an update... I've assembled the fuselage.
All frames are in, and I'm in the process of working the cross-braces.
Its much more encouraging now that I have something that resembles a
major component of an airplane.
The horizontal stabilizer / elevator structure is complete. The fin /
rudder structure is ready to go as well. I haven't started the foam
leading/trailing edges yet since I figure I'll have plenty of chance
to damage them if I finish them now.
I'm trying to figure out how I can fit the wing in my garage and still
leave room to work... In the mean time, the fuselage is plenty to
keep me busy. Thank you for the great support, and I look forward to
the newsletter!
Matt Rix
 Andy Campbell, Sammamish, Washington
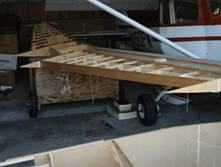
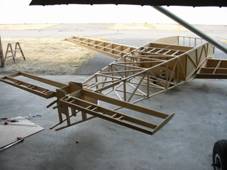
I managed to secure a hangar and got my craft trucked up to it (A
large moving van worked fine). In that time I have also acquired
my FAA mechanic's "A" rating. The Celerity itself has been going
slowly, but I have managed to complete the structure on the wing,
stab, and most of the fuselage.
I plan to change the fin mount so that it bolts on, using steel
brackets. By also making the stab bolt on through a bracket, this would
enable one to remove tail-feathers in case they required servicing or
replacement. It also allows access to the localizer and nav antenna,
which will be mounted along the front side of the stab spar. This
should give it a clear view of the localizer on approach.
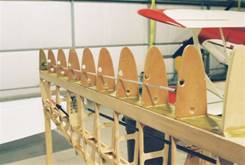
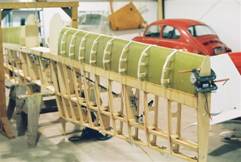
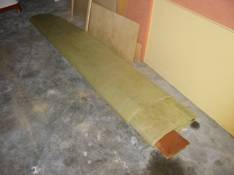
The leading edges for the fuel tanks have also been built. I included
a picture of them waiting for their reinforcing panels.
One way to guarantee a match with the wing spar is to simply use the
spar as a pattern for trimming the rear tank panel and marking on the
leading edge where it crosses the spar. This forces the tank to take
on the correct height for that spar without a lot of measuring.
Andy Campbell (-ahc-) Sammamish, WA
 Some words of wisdom from Austin Underbakke and Gary Rene on plane
finishes
Now that Austin and his partner Don have gotten a lot of filler
applied and have primed the Celerity, they passed along a few
pearls of wisdom by phone.
(I hope I took good notes, or that they correct me if I mis-speak
here!) Austin and Don's Celerity project goes faster with two workers!
They report using AeroLite filler, ½ cup juiced with one squirt
(from their epoxy dispenser) of regular West System fiberglass epoxy
resin (No. 105) and hardener (No. 205). Don and Austin report
that the AeroLite filler, mixed with epoxy as indicated above,
could be hard-sanded after just 24 hours!
Don says they also did
some non-structural filling with resin, hardener, and equal parts
of dry micro and corn starch mixed in. This made an excellent and
easy to use filler that they believe greatly shortened the otherwise
laborious filling and sanding process. By the way, we are talking
here about filling the tiny voids and pinholes in the glass cloth, not
using filler to bring the surface up to grade or anything like that.
For that you need to use structural filler, i.e. resin and hardener
mixed with flox.
Their epoxy primer of choice was duPont Nason
which they brushed on and sanded between coats. This should not
add much weight because at only 6 cups with 1.5 cups micro stirred
in with it, the brew primed and easily filled in all the underlying
scratch marks.
Gary Rene of Savage, Minnesota, reports that he has
been doing a lot of filling and sanding, "About a year's worth!" and
will send some pictures that we can pass along in the next issue.
The late Larry Burton, Celerity designer and founder, used to say
that you should apply your filler liberally because you're going to
sand off about 95 per cent of it. Good advice from a master airplane
builder!
If I recall correctly Larry was also using AeroLite filler
on his Celerity. I say, plan to spend many hours on your finish.
That single representation of your craftsmanship is the first thing,
and for many, the only thing, that they will see of your airplane.
If you have a wavy finish with scratches showing through the finish
or pinholes, you didn't spend enough time on it!
© 2010, Mirage Aircraft, Inc, Tuscon, AZ


